| Available with | basic | standard | plus |
A Google Spreadsheet Add-On makes it easy to export the raw data directly in a spreadsheet.
For that, you just need a Google account to create a copy of this document. Then configure the module with the information found in the back office in the Export tab.
Configuration
Cashless System > Exports
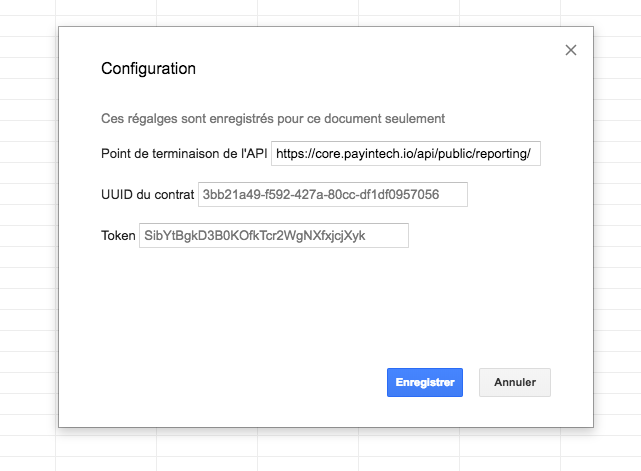
You will need to configure the Add-on:
- the ID of the Cashless System
- the API access token

In the Google Spreadsheet the add-on is available in the menu Additional modules > PayinTech.io import > First configuration
Simply enter both information and click Save.
Use
Preferences
Preferences allow you to set the settings to use on dates during downloads.
- Use local time zone: allows you to download the data with the time zone of your contract and not with the time zone GMT+0.
- Opening time: allows you to define the start time of a day, during a daily or weekly import this allows you to include / exclude sales if you want to have an accounting including sales between midnight and 3 am in the morning for example.
- First day of the week: allows to define, during a weekly import, what is the first day of the week.
- First day of the month: allows to define, during a monthly import, what is the first day of the month.
Filters
Filters are used to apply a filter when downloading data. Point of Interest filters allow you to download only data for one or more points of interest.
* Caution the name of the point of interest must be identical to the one in the Core.
Importation
Once the API and preferences are configured you can import the data. Several possibilities are available to you. In each case, a pop up will allow you to select the period as well as the files to download.


Some later versions of browsers like Internet Explorer or Firefox do not allow a simple selection of the period, in this case the format to indicate is specified below:
- Daily: Import a 24-hour day (by applying time preferences for the opening)
- Format : YYYY-MM-DD
- Example : 2018-01-15
- Weekly: Import a 7-day week (by applying opening hour preferences for the first and last day and the first day of the week preferences)
- Format : YYYY-W##
- Example : 2018-W10
- Monthly: import of a calendar month (by applying the opening hour preferences for the first and last day and the first day preferences of the month)
- Format : YYYY-MM
- Example : 2018-01
- Custom: import a custom period between two dates (by applying opening time preferences on the first and last day)
- Format : YYYY-MM-DD pour les deux dates
- Example : 2018-01-15 et 2018-01-31
- All: import of all available data
- After a specific date: imports transactions created on the server after the selected day (that will not be included)
- Format : YYYY-MM-DD
- Example : 2018-01-15
