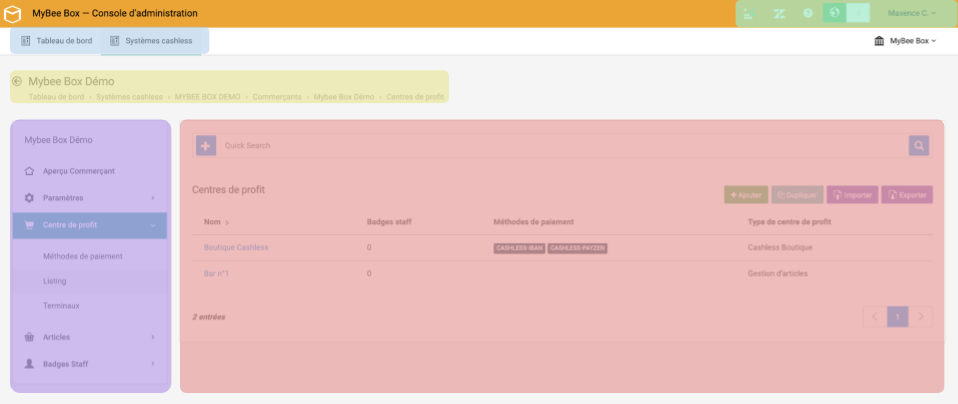
The back-office is the first tool you will use to configure your Mybee Box. You have received (or will soon receive) an email confirming the creation of your account (sent by no-reply@payintech.io).
Once your account is created you will be able to log in to your back office and start the configuration.
Here is how the back office is organized

In the top right are the shortcuts to the Mybee Box Academy for example and the menu to access the settings of the user account.
A first component allows you to choose the desired use between configuring your back office or consulting your dashboard.
The breadcrumb can be used to determine what level of navigation the user is in the Cashless System. It is possible at any time to go up one level by clicking on a breadcrumb link or on the back arrow.
On the left side of the screen is the navigation, which displays the menus available according to the navigation level:
- General settings
- Cashless.fr
- Merchant
- Terminals
- Cashless Tags
- Merchant settings
- Profit center
- Merchant terminals
- Staff tags
- Accepted payment methods
- Available articles
- Authorized vendors
- Article settings
- Article permissions
It is here that the various elements can be configured or consulted depending on the level of navigation.
Caution
Finishing the configuration a week before the event allows to launch it with confidence. As soon as you receive your terminals you will be able to test them.
| Previous | Next |